Dressmaker Guide
How Assembly Works in Dressmaker
Learn what happens after cutting, how Pattern pieces belong to each garment part, and how to prepare the dress correctly before sewing.
Game data build 25482629. Garment parts, pattern names and piece counts on this page are read from the game.
Where assembly sits
Assembly in the Dressmaking Flow
Cutting creates the pieces. Assembly says how those pieces form the garment. Sewing joins them.
- Sketchbook
- Buy Fabric
- Cut
- Assembly — You are here
- Sewing
Three jobs, not one
A cut decides what each piece is. Assembly decides which piece belongs where, and whether anything is still missing. Sewing is the interaction that finally joins them, and it is the stage scored on accuracy. Treating the three as one step is how a dress ends up half assembled and blamed on the needle.
The catalogue publishes 178 patterns, 236 construction variants and 1,871 panels between them. Every count and example on this page is read from those rows.
The chain
From Panel to Garment Piece
Cutting turns a Pattern into pieces. Assembly answers the question those pieces arrive with: which part of the dress does this belong to?
The pieces do not arrive sorted. They arrive as cut cloth in the inventory, one per panel, and the only thing that says where each one goes is the Pattern and the Variant it was cut from. That is why the pattern has to be known before assembly starts, rather than guessed at from the shape of a piece.
- Patternthe shape you chose
- Variantthe cut you selected
- Panelsthe pieces it cuts
- Cut piecescloth in your inventory
- Garment partbodice, skirt, sleeve or collar
A piece never leaves the pattern it was cut from. There is no generic sleeve that can be dropped into any dress — the piece belongs to the pattern and to the variant it came off.
Step 1 — the pieces
Check that every required piece was cut
Make sure every required panel for the selected Variant has been cut before trying to continue.
- The Pattern is the one the dress needs
- The Variant is the one you selected
- Every panel it cuts has been cut
- The Fabric is the one you chose
A garment that will not continue
If the dress seems incomplete, first check whether every panel required by the selected Variant was actually cut. A panel that was never cut is not a rendering problem — it is a piece that does not exist yet.
Return to CuttingStep 2 — the parts
Group the pieces by dress part
A dress is not one pile of pieces. It is a bodice, a skirt, and possibly sleeves and a collar — and each part owns the pieces that were cut for it.
This is the step that stops a dress from being assembled by shape matching. A piece belongs to a part because of the pattern it was cut from, not because it looks like it fits there.
A real dress, read from the data
16 pieces across 4 parts
Bodice
ReadyCinched Keyhole Blouse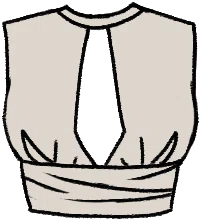
Variant 1
Pieces8 pieces
Skirt
ReadyMermaid Skirt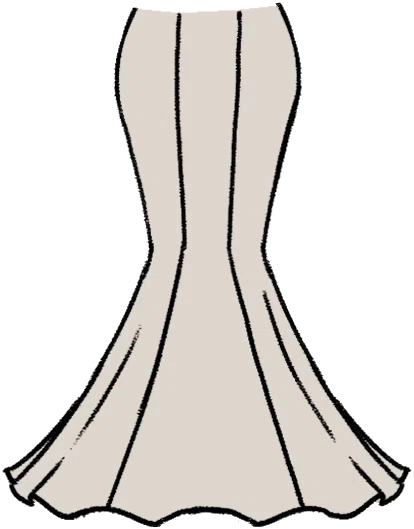
Variant 1
Pieces6 pieces
Sleeve
ReadyButterfly Sleeve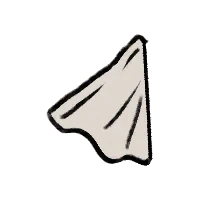
Variant 1
Pieces2 pieces
Collar
Not usedNo Collar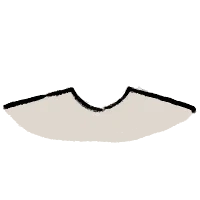
Variant 1
PiecesNo pieces
These rows are one of the game's own validated dresses, not an invented combination. The pattern, the variant and the piece count in each row are the ones the game's own recipe table records for it.
The collar row is filled by a real pattern that cuts nothing at all: No Collar. That is a design without a collar, not a collar that failed to load. Assembly treats those two situations differently, and so should you.
Step 3 — the variant
The Variant decides which pieces this version needs
Two Variants of the same Pattern can use different panel layouts. Always follow the pieces for the Variant you actually selected.
This is the mistake that looks like a bug. A variant that cuts six pieces and one that cuts twelve are the same pattern, and pieces from the wrong one have nowhere to go — so the symptom is not a wrong-looking dress, it is a piece the game will not accept.
The pieces in front of you belong to one specific variant.
When a piece seems to have no place, the first thing to check is not the piece. It is which variant the dress is being built from.
| Dress part | Pattern | This variant | Other variants |
|---|---|---|---|
| Bodice | Cinched Keyhole Blouse | Variant 1 · 8 pieces | Only one variant |
| Skirt | Mermaid Skirt | Variant 1 · 6 pieces | Variant 2 · 12 pieces |
| Sleeve | Butterfly Sleeve | Variant 1 · 2 pieces | Only one variant |
| Collar | No Collar | Variant 1 · No pieces | Only one variant |
Step 4 — the structure
Place the pieces on the mannequin
In the game, assembly happens on the mannequin: pieces come out of the inventory and go onto the spot that belongs to their garment part.
- Open the dress on the mannequin
- Drag a cut piece out of the inventory
- Drop it on the spot that belongs to its garment part
- Repeat until every required piece has a place
- Check the layout, then sew
In the game's own words
Drag the cut out fabric pieces from your inventory onto the appropriate spot on the mannequin.
Official tutorial text, quoted rather than paraphrased: the button names and the nouns a player reads in-game are the game's, not this page's.
What this page does not do
The game documents the mannequin stage as dragging pieces onto the appropriate spot and sewing once the layout is right. It publishes no seam-by-seam order, so this page prints none — a sequence invented here would be a sequence the game never asked for.
The four parts
Bodice, Skirt, Sleeve, Collar
Every dress is assembled from four kinds of part. Two of them are always part of it; two can be left off on purpose.
Bodice
Always part of a dressThe upper part of the dress. There is no bodice pattern that cuts nothing, because a dress cannot be only a skirt.
67 patternsBrowse Bodice patternsSkirt
Always part of a dressThe lower part, and required for the same reason. It is also the part most likely to be cut from many pieces at once in a single slot.
56 patternsBrowse Skirt patternsSleeve
Can be left offOptional. When it is used, its pieces are placed exactly like any other; when it is not, the slot is filled by a pattern that cuts nothing.
34 patternsBrowse Sleeve patternsCollar
Can be left offOptional too, and usually the smallest part — but a collar cut from a single panel still has its own spot on the mannequin.
21 patternsBrowse Collar patterns
The catalogue ships one pattern per optional part that cuts nothing at all — No Sleeves and No Collar — which is how a design says "no sleeves" rather than "sleeves went missing".
Three states, not two
- Ready
The pieces are cut and they belong to this part.
- Missing
The design uses this part and its pieces are not cut yet. This is the state worth acting on, because it is a trip back to the cutting room.
- Not used
The design does not use this part. Nothing is wrong and nothing is needed.
A missing collar and a collar that was never part of the design look the same in a list and mean opposite things. Only one of them is a problem.
Ready?
Before you start sewing
Assembly is finished when this list is true.
- Correct Pattern Variants
- All required panels cut
- Pieces grouped by garment part
- Optional components identified
- Correct Fabric pieces present
- No required piece missing
Ready to sew.
What goes wrong
Common Assembly problems
Five ways assembly stalls, and the check that answers each one.
- The dress will not continueCheck the three things in order: every required piece cut, the correct Variant, and the garment part each piece belongs to. Guessing at a bug is the slowest of the three.
- A piece seems to be missingOpen the pattern's own page and read its panel list against what you have. If a panel was never cut, the answer is a recut rather than a reload.Check a Pattern's pieces
- There are extra piecesPieces from a different Variant or a different Pattern look exactly like pieces from this one. Confirm which pattern and which variant are active before assuming the game made a mistake.
- The sleeve or collar looks missingFirst decide whether the design uses that part at all. A dress with no collar is assembled correctly with nothing in the collar slot — that is a part left off, not a part lost.
- The pieces are placed but sewing will not workOnce every piece has a place, a sewing failure is a sewing problem rather than an assembly one, and it has its own page.Read the sewing help
Two stages, not one
Assembly and Sewing are different jobs
The game performs both on the same mannequin, which is exactly why they merge in the head.
Assembly
Which pieces belong together and how the garment is structured: dragging a piece from the inventory onto the spot that belongs to its part. Nothing is joined yet.
Sewing
The interaction that joins those pieces, and the stage whose accuracy is scored. It begins when the layout is right and the sew button is pressed.
Sewing Accuracy, the weights behind it and how it enters Quality belong to the sewing guide. This page only has to keep the two stages apart.
Next in the workflow
Sew the Pieces Together
The pieces are placed, the layout is checked, and the next step joins them.
Assembly scores nothing on its own. It decides what sewing is working with — which is why a piece in the wrong spot is discovered there.
Next: Sew the Pieces TogetherWhere to go from here
Guides, tools and help for assembly
The step before this one, the step after it, and the pages that take over when a dress will not go together.
About this guide
This page is the Dressmaker assembly guide: what happens after cutting, how cut Pattern panels become the pieces of a garment, how bodices, skirts, sleeves and collars are organised into a dress, and when the dress is ready for sewing. It uses the same part names, pattern names and panel counts the pattern pages publish.
It is deliberately not the cutting page, not the sewing page and not the quality page. How panels are placed and cut, how the sewing interaction works and how Sewing Accuracy enters the finished dress's quality score are three separate subjects with three separate pages, linked from here rather than repeated.
Part of the complete Dressmaker guide: every step of making a dress, in the order the game asks for them.